
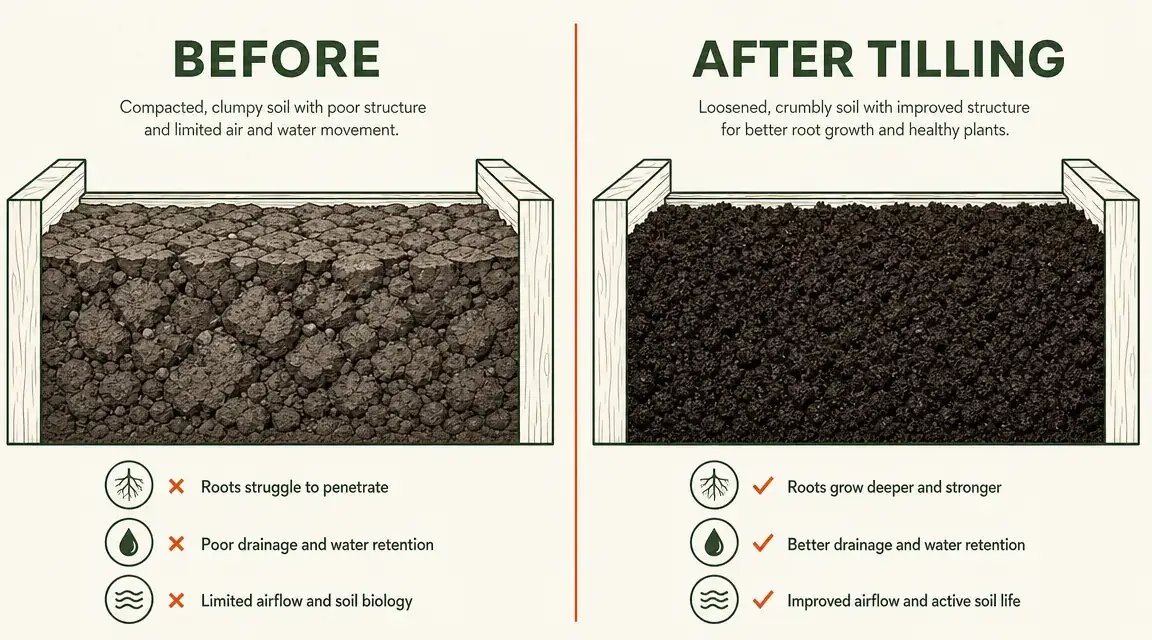
Every spring I stand at the edge of my raised beds and feel the same low-grade dread. The soil has compacted over winter, there is a crust on top from freeze-thaw cycles, and the thought of breaking it up by hand with a fork is not appealing. I have a bad shoulder. My beds are 4 by 8 feet each and I have three of them. That is a lot of stabbing and turning before I can put a single transplant in the ground.
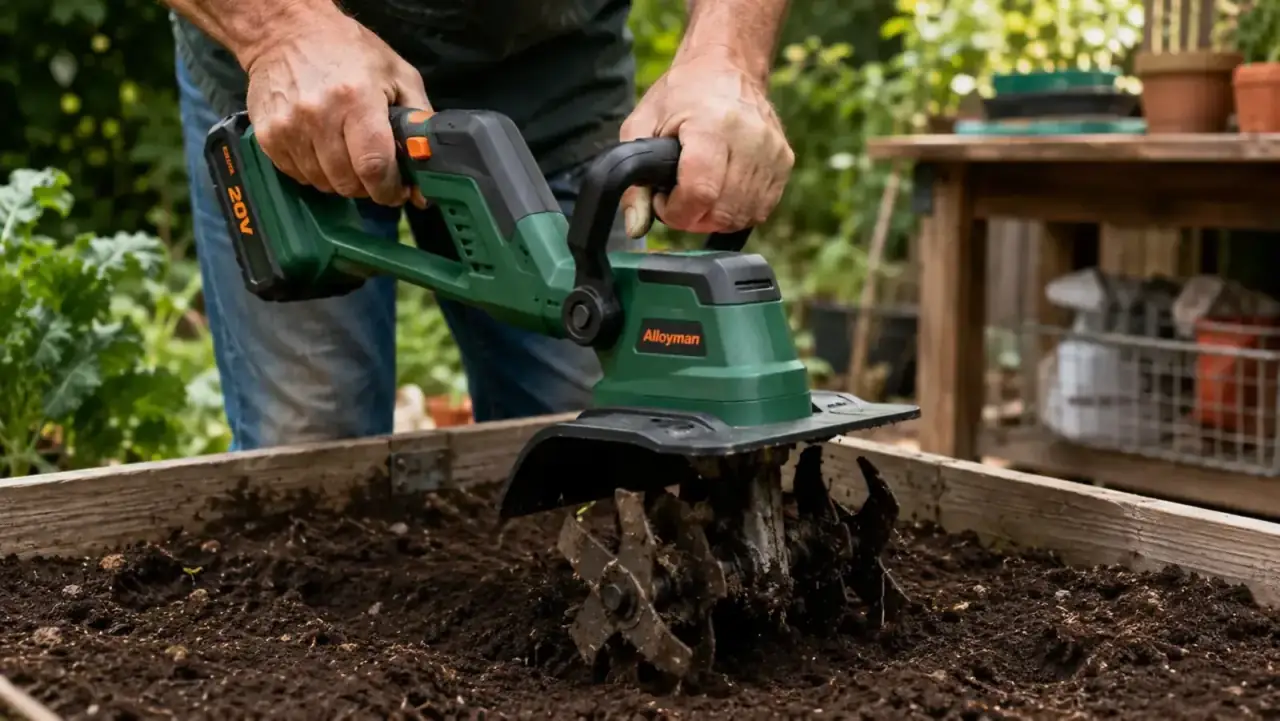
Switching to the Alloyman 20V Cordless Tiller Cultivator changed the math. Three raised beds now take me about 20 minutes total, including moving the machine and swapping positions. The battery handles the full run on a single charge. And the soil comes out genuinely loose, not just surface-scratched, which matters when you are setting in tomato transplants or sowing carrot seeds that need a fine, friable tilth to germinate. This guide walks through exactly how I do it, from the first rake pass to the final amendment mix, so you can replicate the same result without guessing.
Your beds are compacted and planting day is close. Here is the tool that fixes it fast.
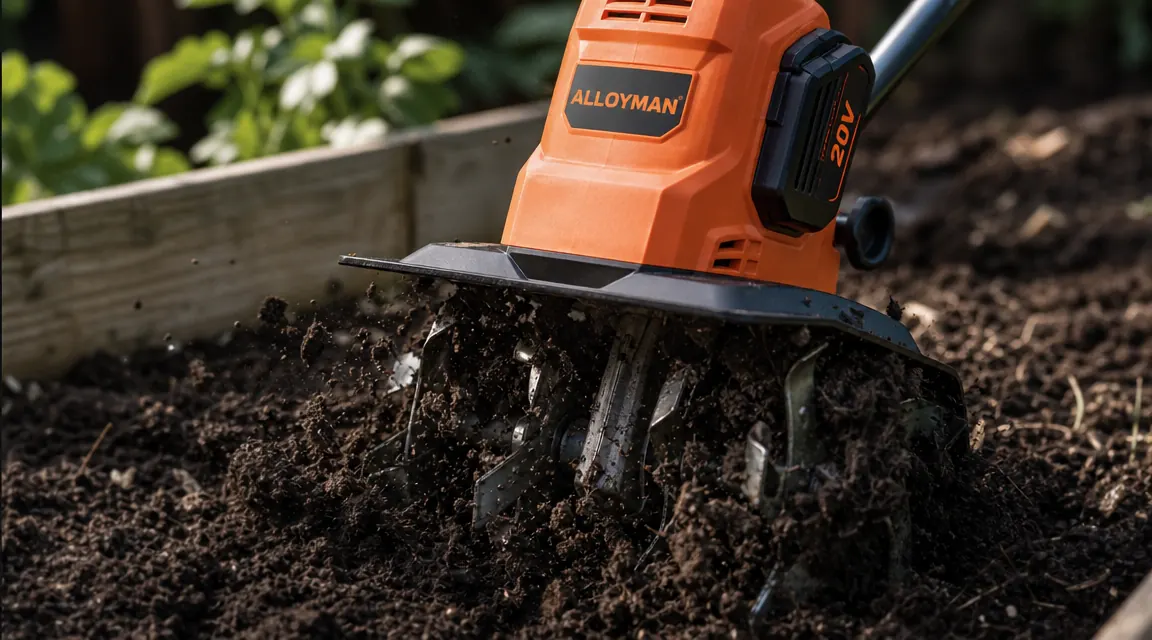
The Alloyman 20V Cordless Tiller runs at 360 RPM with four adjustable tines that reach up to 8 inches deep. No cord, no gas, no fumes in tight bed spaces. Rated 4.5 stars by over 1,200 home gardeners who use it exactly the way this guide describes.
Amazon Check Today's Price on Amazon →Step 1: Clear the Bed Completely Before You Till
The most common mistake people make with a power cultivator is running it into a bed that still has last season's debris in it. Dead plant stems, undecomposed mulch, and old root clumps wrap around the tines within seconds and stall the machine. Before you plug in or charge up anything, spend five minutes raking the surface completely clean. Pull out any remaining stakes, plant tags, or drip irrigation lines. If you left a winter cover crop, chop it down with a hoe and let the pieces dry for a day before you till them in, or just remove them and compost separately.
While you are clearing, check for large rocks or hardware cloth that may have shifted to the surface. The Alloyman tines are steel but they are not meant to hit embedded stones at full RPM. A quick visual pass saves you a broken tine and a frustrating repair mid-session. This step adds maybe eight minutes to the whole process and prevents 90 percent of the problems people report when tilling raised beds with compact cultivators.
Step 2: Assess Soil Moisture Before You Start the Machine
Soil moisture makes or breaks how well a tiller performs. Too dry and the tines bounce across the surface without penetrating. Too wet and they pack the soil into dense clods instead of breaking it apart. The target is soil that clumps when you squeeze a handful but crumbles with light pressure, what old-time gardeners call workable. If your soil is bone dry, water it lightly the evening before you plan to till and let it absorb overnight. If it is sopping wet from spring rains, wait two or three days.
This matters more in raised beds than in open ground because raised bed soil tends to dry faster and compact tighter. A lot of raised bed mixes are peat-heavy, and dry peat is notoriously hydrophobic. The Alloyman will still move through dry peat-based soil, but you will get shallower passes and the battery will drain faster because the motor is working against more resistance. Starting with the right moisture level means the tines drop to their full depth on the first pass, which is what you are actually paying for with a 20V machine.
Step 3: Set Tine Depth and Work in Overlapping Passes
The Alloyman has an adjustable depth setting. For spring bed prep I set it to maximum depth, which gets close to 8 inches in most raised bed mixes. If your bed is very deep and you have never had compaction issues, 5 to 6 inches is fine. The point is to break up any compressed layer that formed over winter, which usually sits about 3 to 4 inches down. Skimming the top 2 inches does not do much except look tidy.
Work in straight passes from one end of the bed to the other, overlapping each pass by about half the tine width. That overlap is important. Miss it and you leave narrow untilled strips that will stop a carrot or parsnip seed from going straight down. On a 4-foot-wide bed I make about five or six passes. Then I make one more set of passes going the perpendicular direction, which catches any remaining clumps and creates a genuinely even tilth. The whole process for one 4x8 bed takes me about six minutes at a relaxed pace.
Step 4: Add Amendments and Till Them In
Once the existing soil is broken up, this is your best opportunity of the year to add amendments and get them worked in deep rather than just sitting on the surface. I add a 2-inch layer of finished compost across the entire bed surface after the first tilling pass. Then I run the cultivator over the bed again at medium depth, about 5 inches, which folds the compost into the top half of the soil column. If the bed had heavy feeders like tomatoes or squash the previous season, I also add a balanced granular fertilizer at this stage and let the tilling distribute it evenly.
The Alloyman handles amended soil without complaint as long as the compost is fully finished. Fresh uncomposted manure or half-broken-down leaf mold will clog the tines the same way debris does. Fully finished compost, the kind that looks like dark crumbly earth with no identifiable original material, integrates cleanly. After this amendment pass the bed should smell earthy and fresh, and when you press a handful together it should hold a loose shape before falling apart. That is exactly the texture transplants want to grow into.
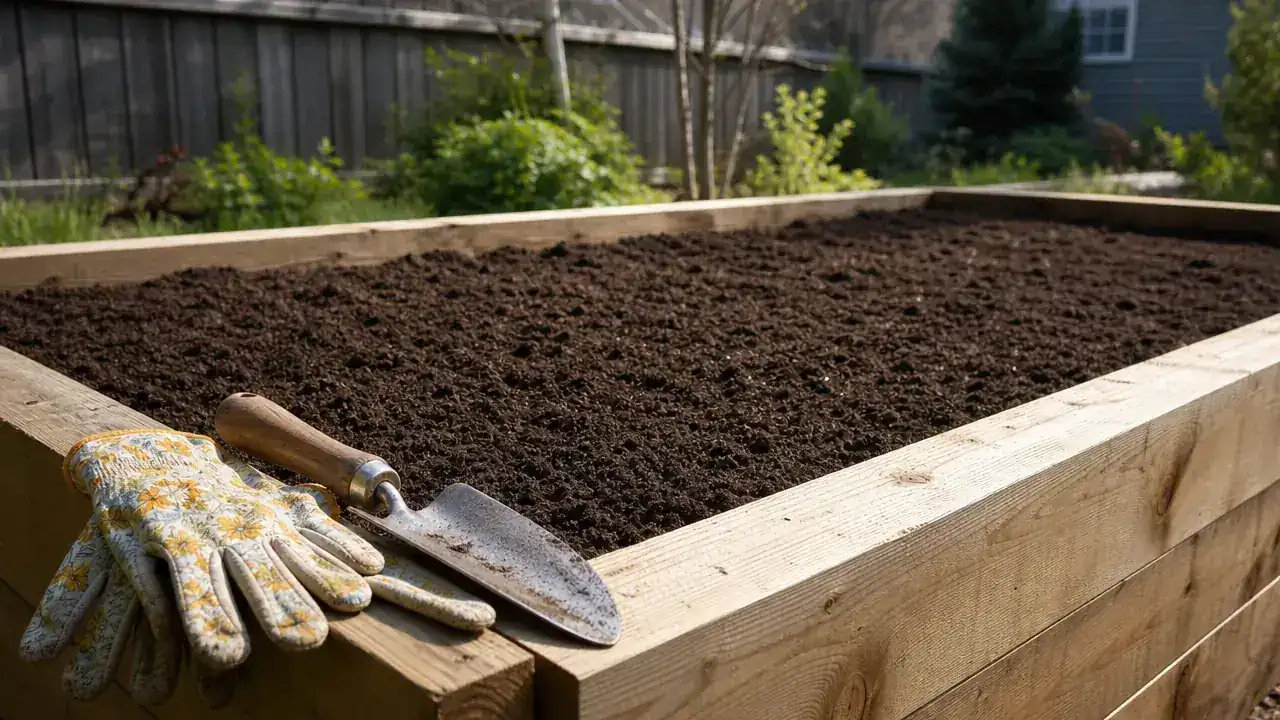
Step 5: Rake Level, Check Edges, and Let It Settle Briefly
After tilling and amending, the bed surface will be rough and mounded in places where the tines threw soil. Spend two or three minutes with a flat-headed garden rake to level everything out and knock down any remaining clumps. Pay attention to the corners and edges of the bed frame, which the circular tine path cannot reach. Use a hand cultivator or a sturdy trowel to work those corners manually. Getting the edges right matters especially if you are direct-sowing seeds close to the frame, which is prime raised-bed real estate.
Once leveled, I let the bed rest for at least 24 hours before planting. Freshly tilled soil is more aerated than it will be in a week, and giving it a day to settle reduces the air pockets that can leave transplant roots hanging in empty space. If you are direct-sowing fine seeds like carrots, lettuce, or herbs, a light firming with the back of the rake after the settling period gives the seed-to-soil contact those small seeds need to germinate reliably. After that, the bed is ready.
What Else Helps
The cultivator does the hard work, but a few supporting habits make the whole process cleaner. Keep the battery charged and stored at room temperature between uses. A cold battery from a garage shelf delivers noticeably less power during the first few minutes of a run. Clean the tines after every session with a stiff brush to remove packed soil and any fibrous material that wrapped around the axle, this takes two minutes and prevents rust and bearing wear. If you are prepping beds that previously grew alliums or brassicas, consider a quick soil test before tilling in amendments so you are not adding nitrogen to beds that already have too much. And read through the honest breakdown in my full Alloyman cultivator review before you buy if you want to understand battery life in detail and what real limitations look like after a full season of use. For gardeners who are still deciding between a cordless machine and a manual hand tiller, the side-by-side comparison lays out exactly where each one earns its place.
Three raised beds, 20 minutes, one battery charge. That is the realistic math once you have the sequence down.
Ready to stop spending your whole Saturday morning on bed prep?
The Alloyman 20V Cordless Tiller is what this guide is built around. Four steel tines, 360 RPM, adjustable depth up to 8 inches, and a battery system that handles three full raised beds on a single charge. Over 1,200 home gardeners use it for exactly the kind of spring prep described above.
Amazon Check Today's Price on Amazon →